Frequently Asked Questions (FAQ's)
-
Web Sites
Email
-
2. How do I setup Email on my Windows 8 Phone?
Step 1
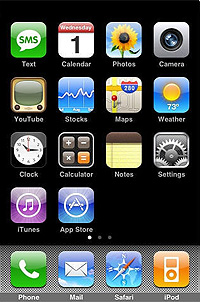
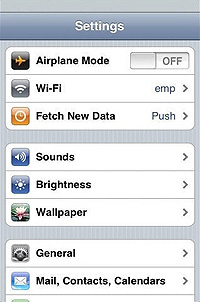
 Tap Settings, or slide to the left, and scroll to Settings
Step 2
 Select Email and Accounts
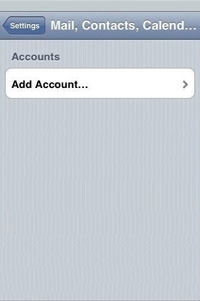
Step 3
 Choose Add An Account
Step 4
 Scroll down until you see other account
Step 5
 Choose "Tap" Other Account
Step 6
 Enter in credentials ([email protected] and case sensetive password), tap Sign In � the system will fail at this point, which you want it to do.
Tap Try Again to get the Advanced optionStep 7
 Choose "tap" Advanced
Step 8
 Choose "tap" Internet Email
Step 9
 Enter in all fields. Username is full email address. Under Account Type, choose POP3. Scroll down.
Step 10
 Enter email under Username. Type mail.yourdomain.com for the Outgoing (SMTP) Email Server. Select Outgoing Server Requires Authentication and Use The Same User Name and Password for Sending Email. Tap Advanced Settings.
Step 11
 Uncheck both SSL fields. Select your download options. Tap Sign In.
Step 12
Should return you to the email accounts screen with the new email attempting to sync your new accountStep 13
 When you press the home key, you will see a new tile. Tap it.
Step 14
 Press the re-sync button to sync manually.
Step 15
 Once your new account has sync you will see new unread emails in your inbox.
�
Step 1) Tap Settings, or slide to the left, and scroll to Settings
Step 2) Select Email and Accounts
Step 3) Choose Add An Account
Step 4) Scroll down
Step 5) Choose Other Account
Step 6) Enter in credentials, tap Sign In � the system will fail at this point, which you want it to do. Tap Try Again to get the Advanced option
Step 7) Choose Advanced
Step 8) Choose Internet Email
Step 9) Enter in all fields. Under Account Type, choose POP3. Scroll down.
Step 10) Enter email under Username. Type mail1.absinternet.com for the Outgoing (SMTP) Email Server. Select Outgoing Server Requires Authentication and Use The Same User Name and Password for Sending Email. Tap Advanced Settings.
Step 11) Uncheck both SSL fields. Select you download options. Tap Sign In.
Step 12) Should return you to the email accounts screen with the new email attempting to sync
Step 13) When you press the home key, you will see a new tile. Tap it.
Step 14) Press the re-sync button to sync manually. -
3. How do I setup Email on my Android Phone?
Step 1

From the Home Screen or Application Menu, click the Mail icon.Step 2

If you DO NOT already have a POP, IMAP or Exchange email account setup on your phone, skip to step 5, other wise you should see a screen like this. From this screen, click the Menu Button on your phone to bring up additional setting options.Step 3

Click More.Step 4

Click New account.
Step 5

Select Other (POP3/IMAP).Step 6

Choose Manual Setup.Step 7

Fill out the Incoming settings screen like this example with your specific credentials then click Next.Step 8

Fill out the Outgoing server settings screen like this example with your specific credentials.
Change the port from 25 to 366 then click Next.Step 9

Choose what to call this email account on the following screen then click Finish Setup.Text Only Steps
- From the Home Screen or Application Menu, click the Mail icon.
- If you DO NOT already have a POP email account setup on your phone, skip to step 5, other wise you should see a screen like this. From this screen, click the Menu Button on your phone to bring up additional setting options.
- Click More.
- Click New account.
- Select Other (POP3/IMAP).
- Choose Manual Setup.
- Fill out the Incoming settings screen like this example with your specific credentials then click Next.
- Fill out the Outgoing server settings screen like this example with your specific credentials. Change port number 25 to 366 then click Next.
- Choose what to call this email account on the following screen then click Finish Setup.
-
4. How do I manually configure Outlook 2010 with Exchange 2010?
1. Click the Windows Start button, select Control Panel, then select the Mail icon.
Note: Depending on what version of Windows you're running, you may need to switch to Classic View to find the Mail icon or it may state 32-Bit. On Windows 7, in category view, you will find the Mail icon in the User Accounts category.

Note: Depending on what version of Windows you're running, you may need to switch to Classic View to find the Mail icon or it may state 32-Bit.
2. Select the Show Profiles button, select the Add button and enter in a name for this profile and select the OK button.

3. Select the Manually configure server settings or additional server types check box, and then select the Next button.

4. Select the Microsoft Exchange option and click the Next button.

5. Enter in "outlook" in the Microsoft Exchange server address field and select the Use Cached Exchange Mode check box. In the User Name box, enter in your entire email address and then select "More Settings."

6. Next, select the Connection tab, select the Connect to Microsoft Exchange using HTTP check box and then Select the Exchange Proxy Settings button.

7. Enter in "connect.emailsrvr.com" in the Proxy Server address. Select both the On fast networks and On slow networks check boxes and under Proxy authentication settings, select Basic Authentication. Click OK to close the proxy settings window. Then Apply and OK to close the More Settings window.

8. Select the Check Name box in the Connect window, enter the password that your administrator assigned to
your email account and select the OK button.Note: You may receive a pop-up asking you to select your mailbox from a list. Select your mailbox and click the OK button.
9. Your name will then be highlighted and a line will appear under the username field which indicates your profile has been configured. Select Next, finish, and open up Outlook.

https://emailhelp.rackspace.com/#/
-
5. How do I setup my Outlook?
Review this guide to setup your email in Outlook.� This tutorial features Outlook 2007, but can also be used for Outlook and Outlook Express.� Some images my vary.
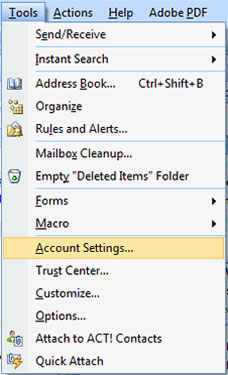
Open Outlook and select the Tools menu, then select Account Settings to begin.
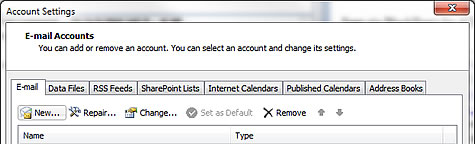
Add New Email Account
From the Email tab, click on New
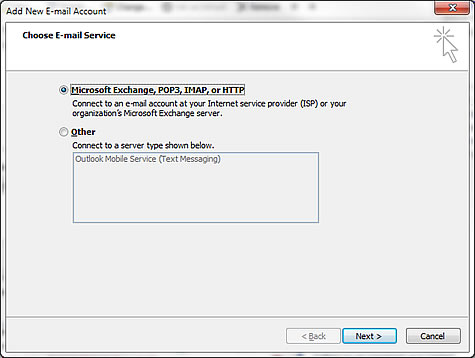
Choose Microsoft Exchange, POP3, IMAP, or HTTP for your email service.
Fill out the requested information for Auto Account Setup
Your Name:� Your Name
Email Address:� Your Email Address
Password:� The Password for the Email Account
Retype Password:� Retype your Email Account Password
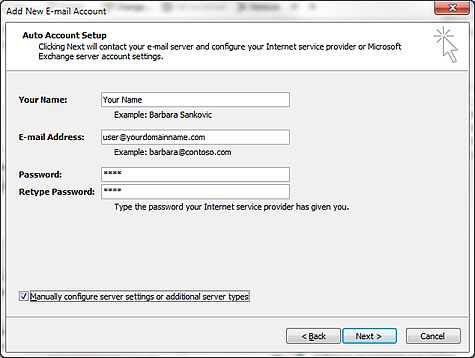
Check the box to Manually configure server settings or additional server types, then click Next.
Choose Internet E-mail, then click Next.
Fill out the requested information for your Internet E-mail Settings
Account Type:� POP3
Incoming Mail Server:� mail.yourdomainname.com (.net, .info, etc.)
Outgoing Mail Server:� mail.yourdomainname.com (.net, .info, etc.)
User Name:� Your Full Email Account
Password:� Type in your Password
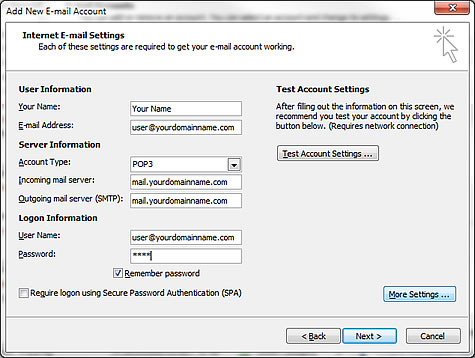
Click on More Settings...
Select the Outgoing Server tab
Check the box for My outgoing server (SMTP) requires authentication, and make sure to Use same settings as my incoming mail server.
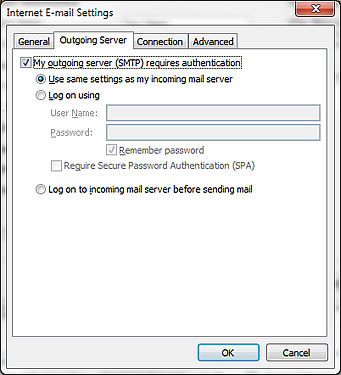
Then click on the Advanced tab
Change the Outgoing Server Port to 366.
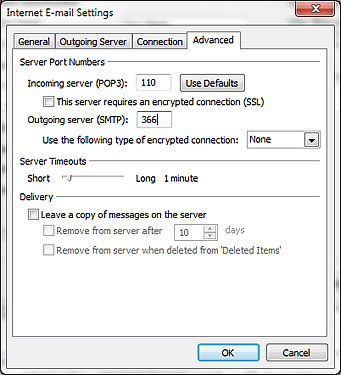
Click OK
Click Test Account Settings in order to verify the account has been setup properly.
Click Next, then click on Finish.
-
6. How do I setup my Mac Mail?
Review this guide to setup your email on Mac Mail.� This tutorial features OSX 10.5 Leopard, but can be followed for earlier versions as the steps are similar.� Some images may vary.
Open Mac Mail.� If this is the first time using the program you can skip to the Add Account Wizard.� If you need to Add a New Account see below.
Select the Mail menu.
Select Preferences.
Click on Accounts tab, and click the + sign to Add an Account.
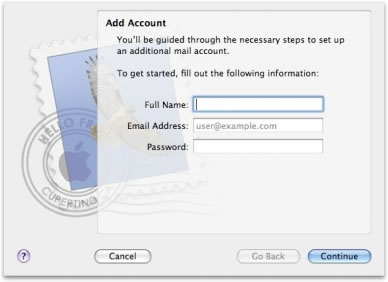
Add Account Wizard / Mail Setup
Fill out the requested information
Full Name:� Your Name
Email Address:� The Full Email Address
Password:� The Password for the Email Account
Click on Continue
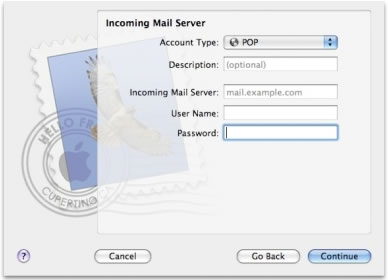
Fill out the requested information for the Incoming Mail Server:
Account Type:� POP3 (or POP)
Description:� (Optional)
Incoming Mail Server:� mail.yourdomainname.com (.net, .info, etc.)
Password:� The Password for the Email Account
Click on Continue
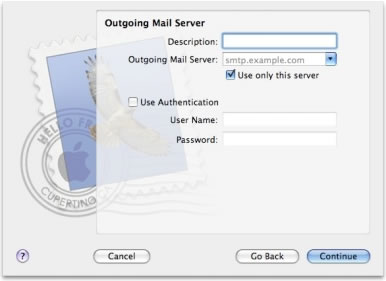
Fill out the requested information for the Outgoing Mail Server:
Description:� Description of Email Account
Outgoing Mail Server:� _____________
Check the Use Authentication box
User Name:� The Full Email Address
Password:� The Password for the Email Account
Click on Continue
Mac Mail has defaults for removing emails from the server that you may want to change.� To do this you can go to...
Click on the Mail menu, and select Preferences
Choose the Accounts tab
Click on Advanced.� We suggest you set the removal time to 90 days.
-
11. How do I setup my iPhone with POP3 email?
Please note that Thinking2 does not provide technical support for troubleshooting iPhone POP3 mail setup.� This is a basic tutorial for your convenience.� If you are having issues setting up your email please have your email settings (i.e. user, password, ports, etc.) and contact Mac for support.
Add Email Account on iPhone
�
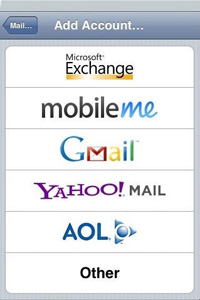
If this is the first account you are setting up on iPhone, simply tap Mail and then select Other.
If this is an additional account please go to the Home Screen > Settings > Mail > Accounts > Add Account > Other
 ����
���� 
Enter Account Information
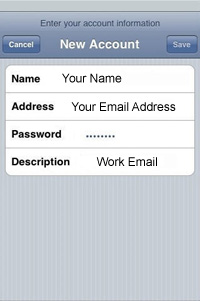
Select POP and then add the following information:
Name:� The user�s Display Name
Address:� Your email address
Description:� How you want to identify the specific email account, such as work or home.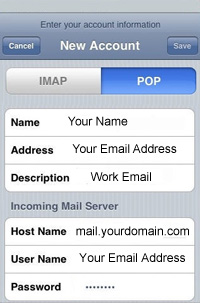
Incoming Mail Server
Host Name:� mail.yourdomainname.com
Username:� Your Full Email Address
Password:� Your Email Account Password
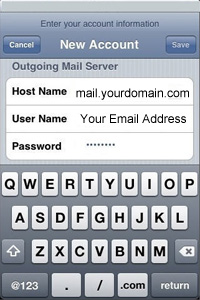
Outgoing Mail Server
Host Name:� mail.yourdomainname.com
Username:� Your Full Email Address
Password:� Your Email Account Password
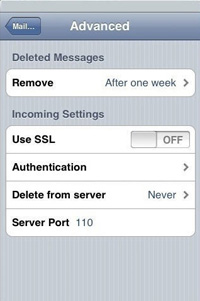
*We also suggest changing your Outgoing Server Port to 366
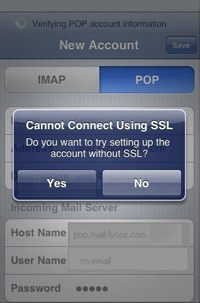
Complete The Setup Process
Click Save and wait for the iPhone to test your incoming and outgoing mail settings and connect to your mailbox.
*Cannot Connect Using SSL
I you see this message, click Yes to proceed setting up the account without SSL.
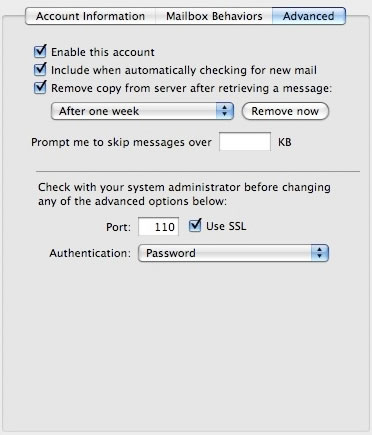
Advanced Settings
The default Advance Settings will not need to be changed unless you haven't already changed your Outgoing Server Port to 366.� If you have not done so already, please do so now.